
Audio Track
Audio tracks are a new feature in iMPC Pro 2 that allow you to record audio alongside your existing drum and AudioUnit tracks. This enables you to record from iPad Mic, audio devices (such as Lightning or class-compliant USB audio gear), or InterApp Audio instruments.
Adding an Audio Track
When you add a new track, it will ask you which type of track you want. For an audio track, select “Audio Recording Track”.
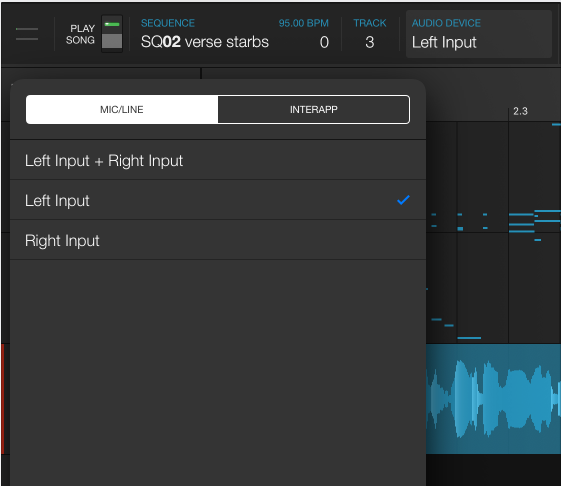
Selecting an Audio Device
Once an audio track is selected, the “Program” pulldown in the transport bar will change to read “Audio Device” and will display a list of audio devices.
The user can also tab over to “InterApp” to select an InterApp-capable program to record from. This particular menu will only show InterApp generators (instruments), not effects.
Recording Audio
To record audio, select your audio track and arm RECord by tapping the “REC” button in the transport. It will turn red, indicating that it is ready. When you then tap Play, you will hear the count-in just like with a Drum or AudioUnit track.
If the “Play Song” switch in the transport is on, it will flip from sequence to sequence and create a continuous recording as your song plays back. If “Play Song” is not selected, REC will click off as soon as the sequence loops. This mode is ideal for recording one take for a specific sequence where “Play Song” is good for recording a take over an entire song.
Tracks Mode
This is the mode where you’ll likely be spending most of the time when editing audio tracks. In this mode, you can see your recorded audio alongside the MIDI from the other tracks.
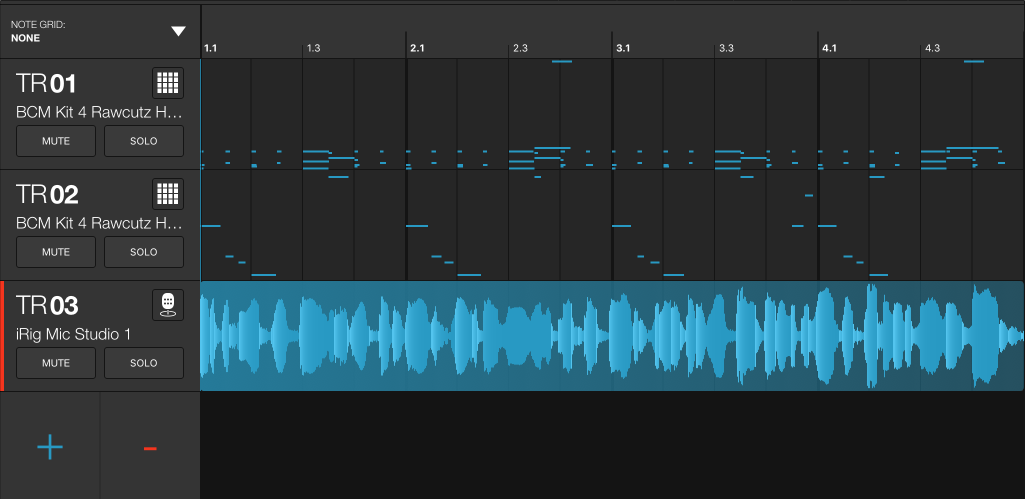
Any time you see this blue waveform view, audio may be split, edited, and stretched. More on this below.
Perform and Tweak Mode
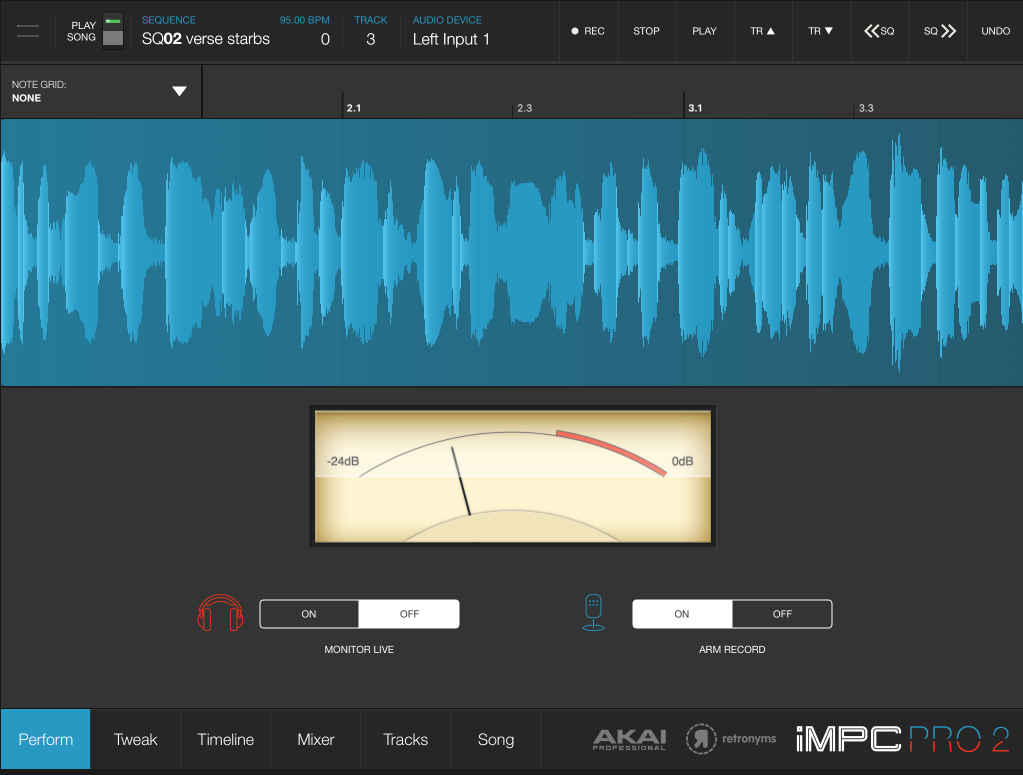
When an audio track is selected, Perform and Tweak modes change from their usual drum pads to show a zoomed in view of your audio. In Perform Mode, a VU meter shows how much headroom your audio signal has left, which is convenient for making recordings that are hot, but not too hot. Here, input monitoring may also be enabled or disabled. Be careful with input monitoring as it can cause loud feedback.
Recording defaults to being armed, but this can be toggled off from this view if the user wants to record new automation without overwriting their audio.
The Tweak mode is similar. It has the same waveform view as Perform, but gives you access to the mixer controls for that track.
Slicing and Editing Audio Recordings
Audio recordings may be sliced, reversed, amplified, moved, duplicated, and stretched.
To get to the Reverse, Duplicate, Split, Rename, or Delete functions, just tap on the audio recording you want to alter. Split works a little differently than the other features: Once Split is tapped, you are in split mode. Tap again on the audio track to split it where you tap. If the Note Grid is active, this will snap to the closest grid marking.
Amplification and stretching functions are gotten to by dragging one of the 6 green nodes which appear after an audio clip is tapped:
- Stretch in time: Upper-left and Upper-right (drag left and right)
- Crop start or end of clip: Lower-left and Lower-right respectively (drag left and right)
- Amplify: Upper-middle (drag up and down)
- Tune: Lower-middle (drag up and down)
AudioPaste Into an Audio Track
To AudioPaste into an audio track, tap anywhere on that audio track. A menu will pop up. Tap the “AudioPaste” option and follow the on-screen prompts.