The Tabletop
Just like on a tabletop hardware setup, all devices are connected to each other on a single surface. The tabletop is divided into a grid of nine swipeable screens, with some devices taking up a full screen and others taking up one half or one quarter of a screen. This modularity allows a wide array of devices and effects, and everything on the surface is movable.
Transport (Controls)
The Transport is the bar at the top of the screen that controls a Tabletop session. In different view modes it displays different controls.
![]()
Add Devices
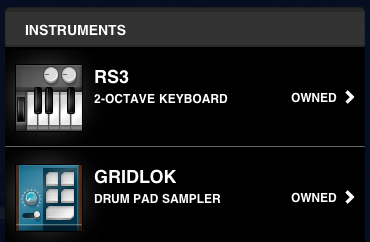
To add a device to the tabletop, tap the DEVICES button in the upper right of the Transport. Here you’ll find a comprehensive list of all devices available for Tabletop, including ones you own and those available for in-app purchase. An owned device in the list is flagged as OWNED, and you can drag it from the list onto any available spot on the tabletop.
![]()
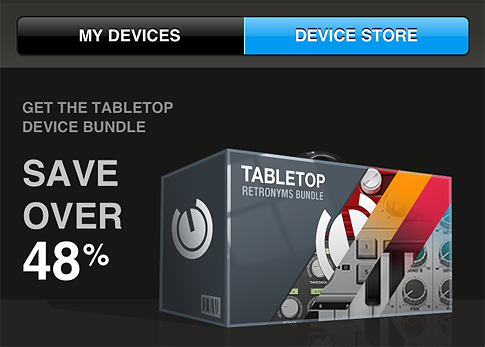
If you do not own a device, tap it to view more details. You can purchase the device here and then tap ADD TO TABLE to add it to your session.

You can buy all the devices in Tabletop at a steep discount by purchasing them in a bundle.
Restore Devices
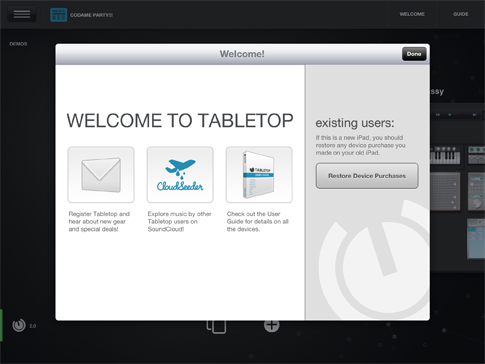
When installing Tabletop on a new iPad, do not restore your purchased devices by buying them again in the Device Store. Instead, go to the session browser, and tap the WELCOME button. This window has the option to RESTORE DEVICE PURCHASES on the right hand side; tap this button to restore all device purchases in one touch.
Tabletop-Ready Devices
Tabletop 2.0 also features compatibility for Tabletop-ready devices. Tabletop-ready devices are third-party apps that once purchased in the App Store unlock the corresponding device in Tabletop. These devices will show in Tabletop’s device menu, but when you try to buy them you’ll be re-routed to the App Store to complete the purchase.
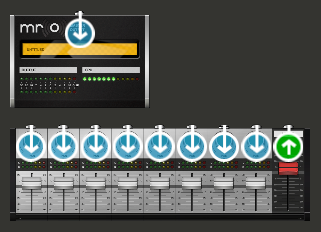
Route Devices
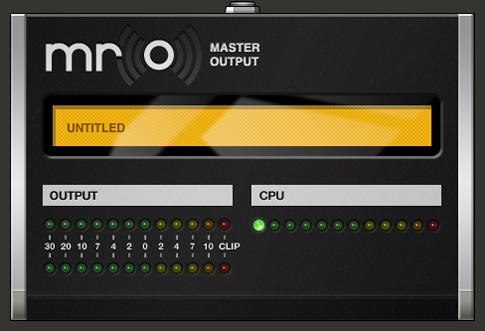
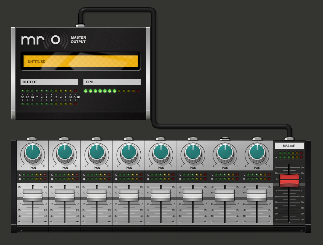
A device must be routed properly in order to be audible, just like in a hardware setup. Every session requires the use of a Mr. O device to control audio output of the entire song and monitor processor usage. All devices must be chained to Mr. O for their sound to be audible.
Tap the ROUTING button in the upper right corner of the transport to view device routing. You’ll see a series of colored arrows and paths showing how devices are connected to each other. Any time you add an effect to the tabletop you will need to enter Routing mode and connect devices together properly to complete the signal chain.
![]()
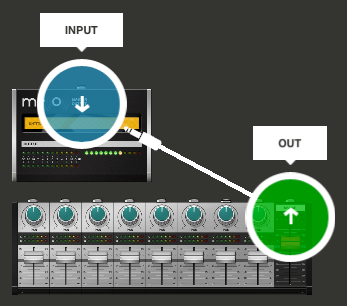
Tap the output of the device you want to hear, and drag its cable node to an available port. The second port will highlight as selected (with a floating label), and upon release it connects to the original port.
Recording and Playback
The two buttons left of the timecode in the Transport allow you to record and play back sound. When recording, all sounds are captured for any device currently being played. Tap the PLAY button to play back audio.

Device View
When zoomed in on a device, the Transport focuses on playback tools (play and record, click track). The current playback position in the loop is always displayed in the center of the Transport in all views.
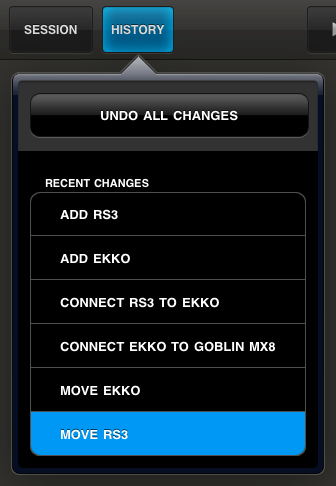
Undo any recent changes by opening the HISTORY menu on the left side.

Quickly move between devices on the tabletop with Swipe Mode. When the SWIPE button on the upper right is enabled, you can use the one finger swipe to move in any available direction to view another tabletop cell. Tap the Swipe button to disable it; the disabled button will show a line through it.

To return to Table View, tap the zoom button in the upper left.

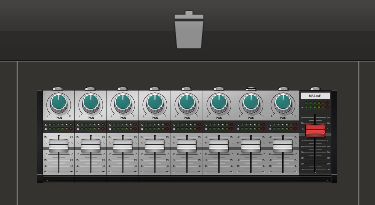
Table View and Deleting Devices
When viewing the table, the Transport offers additional session controls. Only in Table View can you add or remove devices or change device routing. You can change the position of any device on the table by tapping, holding and dragging into any available space. To delete a device, drag it up to the Transport. The Transport will change to a trash can; drag the device onto the trash can to delete it from the session. Any time you delete a device routed to other devices, you’ll need to update the routing to ensure that the audio signal is still connected to a mixer and/or master output. Since it is required to hear audio, you cannot delete the Mr. O master output.
History
Tabletop stores up to ten undoable actions at a time. These actions do not include changing patterns on pattern machines, but they do include adding, moving or deleting devices, recording, or changing routing. At any time you can tap the HISTORY button and back up up to ten steps. Once you perform a new action, all greyed steps are wiped out and Tabletop stores any new changes. To undo all steps in the history list, tap UNDO ALL CHANGES.
Settings
Settings are global across the entire session. Access Settings at any time in the upper right corner of the Transport.
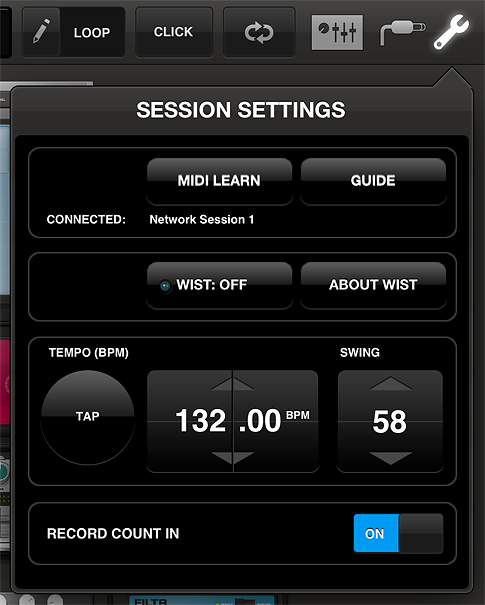
MIDI Connections and MIDI Learn
Tabletop 2.0 allows users to connect their MIDI devices to Tabletop; the process of setting up the MIDI device is called MIDI Learn. MIDI-mappable controls are dials, sliders, touch pads, and keyboards; all MIDI-mappable controls are highlighted blue on each device.
To enter MIDI Learn mode tap that button in the Session Settings. Make sure your MIDI device is connected to the iPad via the camera connection kit, tap the control you want to map to on the device, then tap the corresponding control on the MIDI device.
Tabletop controls are only mappable to similar controls on a MIDI device. For example, you won’t be able to control a keyboard with a touchpad device.
WIST
Korg’s WIST technology allows any iPad running the app to sync to another device running a WIST-compatible app. When two devices are working together via WIST, whichever is the master is the only one capable of controlling settings; settings for the slaved device are inherited. Changing settings on either device will disrupt synchronization and require re-establishing a WIST connection.
Tap the WIST LED button to enable WIST. WIST requires the use of Bluetooth, and if it’s not currently enabled on your iPad, you will be prompted to do so. You can also manually enable Bluetooth in your iPad’s native Settings app, under General > Bluetooth. When you enable WIST in Tabletop, a dialog will then appear as WIST searches for other devices running compatible apps. (For a full listing of available WIST-compatible apps, tap the ABOUT WIST button.) Any secondary device needs to confirm the WIST connection before the devices will be properly synchronized. Once connected, the Master device’s transport triggers playback on all connected devices, and slaved devices should begin playing in the same tempo.
Tempo
You can change the tempo for your session by either tapping the TAP button or adjusting the dial. The Tempo affects the speed of the entire session and all devices.
Swing
Swing pushes the notes forward in the beat on the scale of 0 (current beat) to 100 (next beat).
Record Count-In
Enabling Record Count-In provides a countdown of four beat clicks to prepare for the actual recording process.